Quick Start
How to run a voice campaign with DandyDialer
In this section, we will guide you to get your first voice campaign (voice broadcast / press-1) up and running with minimal effort.
1. Preparations
Before you begin, make sure you have these things handy -
-
A list of phone numbers or leads you want to call. They should be in a csv file. If you have an spreadsheet of your leads, you can easily convert them to csv from Microsoft Excel or Google Sheet.
-
The audio file of the recording you want to broadcast. Although, if you want to use the built-in text-to-speech system, you don’t need this.
-
An account with a SIP/VoIP service provider.
DandyDialer is not a SIP gateway provider. To make phone calls, as a customer, you need to have a SIP account provided by a third party SIP service provider. Please take a look at this section to know more about SIP gateway service providers.
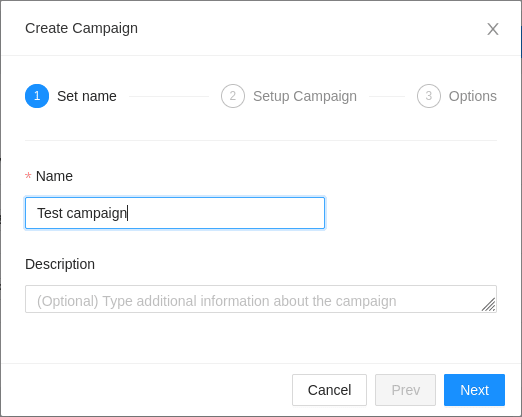
2. Campaign creator wizard
-
Go to the Campaign panel by clicking on
 button on the left navigation menu.
 -
In the panel, click
 button. This will open the campaign creator wizard.
-
Type in a name for the new campaign in the
Namefield. -
Optionally, you can add a
Descriptionfield to better organize your campaigns. -
Click
Nextbutton to go to next stage. In this stage, you will have to configure various resources associated with the new campaign.
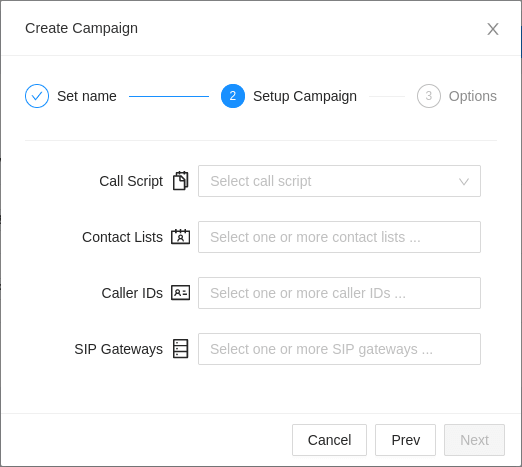
3. Attaching a call script
In DandyDialer, type of a campaign is determined by the type
of the call script attached to it. After clicking on the drop-down
selector labeled Call Script, you will be shown a list of all of your call
scripts.

-
If you want to re-use an existing call script, select it.
-
If you don’t have any call script yet, you need to create one. Click on
 button to open the call script
creator wizard.
button to open the call script
creator wizard.
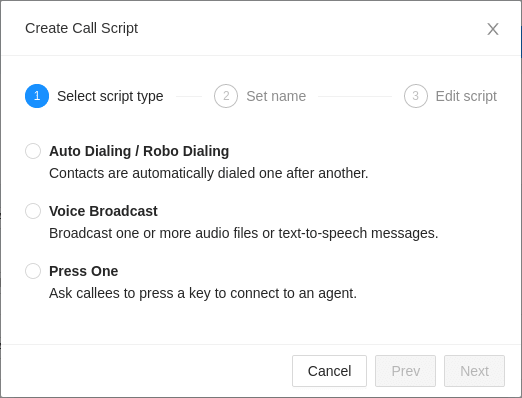
3.1. Adding new call script
-
Choose the type of call script you want to create. If you just want to send an audio message to your leads, select
Voice Broadcast. If you want them to talk to an agent upon pressing a key, selectPress One. -
Click
Nextto go to next stage.
-
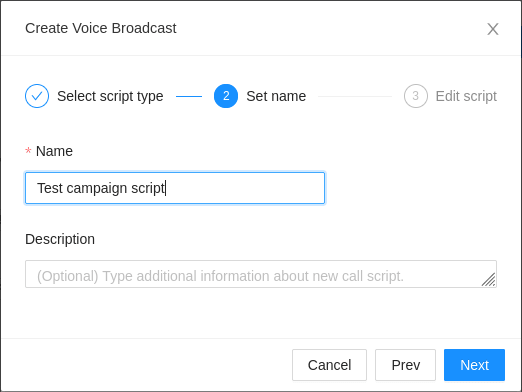
In the
Namefield you can see the automatically generated name of the script. You may change it if you want. You may also add aDescription. -
Click
Nextto proceed. The next stage will differ based on the selected script type.-
For auto-dial campaigns, an auto dial campaign designer will be displayed.
-
For voice broadcast, a voice broadcast designer will be shown.
-
For press-one campaigns, a press one campaign designer will be presented.
-
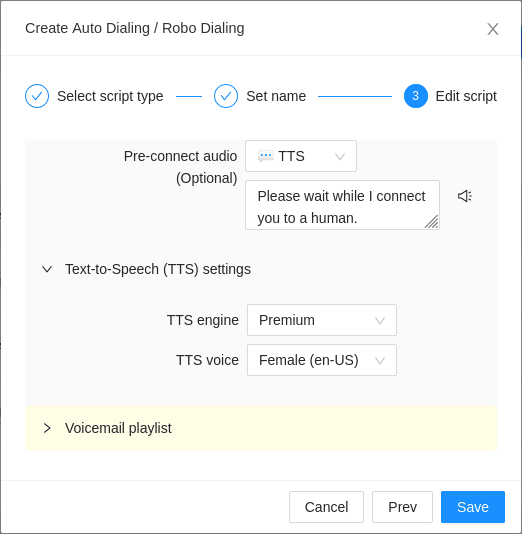
3.2. Designing an auto-dial campaign
-
Auto-dialing is the most straight forward among all the campaign types supported by DandyDialer. There is an optional field called
Pre-connect
audio
which you can use to play a message to the callee right after they answer the phone call. If you want to configure this field, follow along rest of this section. Otherwise, just pressSavebutton and skip to attaching a contact list section.
An agent is dialed only after a call is answered. If there is a chance
of delay before agents answer their side of the call, you should setup
a Pre-connect audio. Usually, it should be a simple and short message
asking the callee to wait for a bit.
|
-
To broadcast a speech generated from text as pre-connect audio, Write your message in the box. You may click on the audio preview button(
 )
shown besides the box to listen to the computer generated voice.
)
shown besides the box to listen to the computer generated voice. -
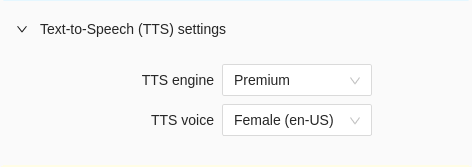
You may configure how the machine generated speech sounds. To view related options, click on
Text-to-speech (TTS) settings.
-
To broadcast an audio file as
Pre-connect audio, click on the play-type selector button ( ), and select
 TTS. In place of the TTS input box, you will now see an audio selector. Click on it. A drop-down will be shown where you can select from all of your previously uploaded audio. To upload a new audio, click on button which will open the
audio uploader modal. After a successful upload,
the audio will be automatically selected.
button which will open the
audio uploader modal. After a successful upload,
the audio will be automatically selected.

For uploading, DandyDialer supports most of the common audio file formats, like - mp3, wav, ogg etc.
|
-
Optionally, you can configure the
Voicemail playlist. If your clients miss the call, their answering machine can get the news for them. DandyDailer automatically detects the beep of an answering machine and drops the voicemail.
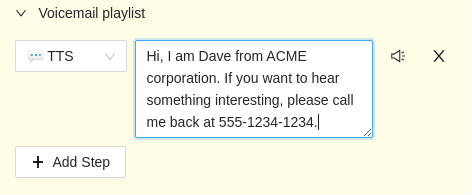
| Voicemail functionality is only available in higher tier subscriptions. |
-
Click
Savebutton to save the call script. -
Next, go to attaching a contact list section of this guide.
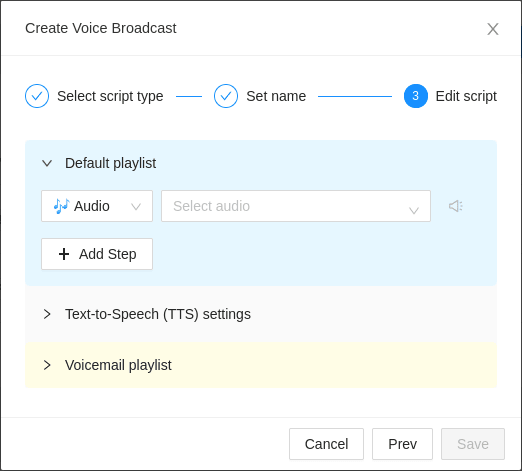
3.3. Designing a voice broadcast
-
Voice broadcast designer has three collapsible sections -
Default playlist,TTS SettingsandVoicemail playlist. Among the three,Default playlistis the most important one. Here, you can select one or more audio files or text-to-speech texts for your broadcast.
| Some sections are collapsed by default to reduce cognitive load. When necessary, click on the section title to expand or collapse a section. |
-
To broadcast an audio file, click on the text input fields of the first line in
Default playlist. A drop-down will be shown where you can select from all of your previously uploaded audio. To upload a new audio, click on button which will open the audio uploader modal.
After a successful upload, the audio will be automatically selected.
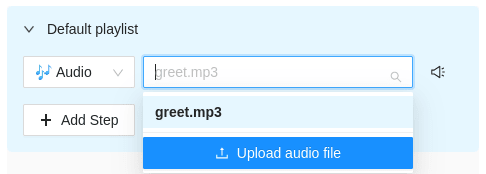
For uploading, DandyDialer supports most of the common audio file formats, like - mp3, wav, ogg etc.
|
-
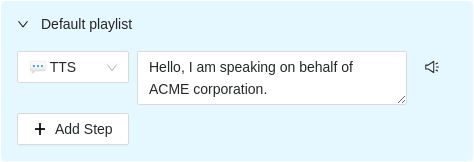
To broadcast a speech generated from text, click on the play-type selector button (
),
and select TTS. In place of the audio selector, you will now see a text box. Write your message in the box. You may click on the audio preview button( )
shown besides the box to listen to the computer generated voice.
-
You may configure how the machine generated speech sounds. To view related options, click on
Text-to-speech (TTS) settings.
| Depending on your subscription, some better quality TTS engines might be grayed out. To use them, you need to upgrade to a higher tier subscription. |
-
If you have more than one audio file, you can add more steps with
 button
and configure them like the previous one.
button
and configure them like the previous one. -
Optionally, you can configure the
Voicemail playlist. If your clients miss the call, their answering machine can get the news for them. DandyDailer automatically detects the beep of an answering machine and drops the voicemail.
| Voicemail functionality is only available in higher tier subscriptions. |
-
Click
Savebutton to save the call script. -
Next, go to attaching a contact list section of this guide.
3.4. Designing a press-1 campaign
-
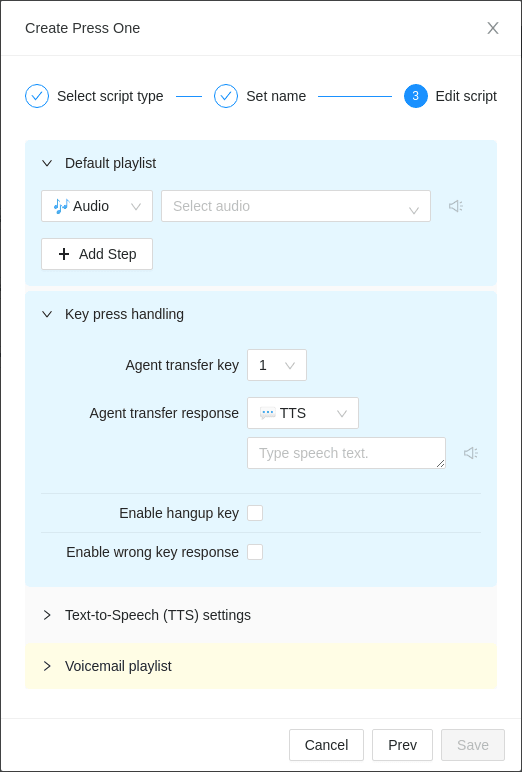
Press-1 campaign designer has four sections -
Default playlist,Key press handling,Text-to-Speech (TTS) settingsandVoicemail playlist. -
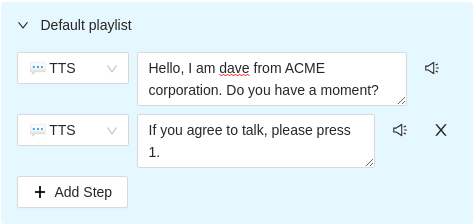
Default playlistis where you input your audio or text-to-speech text. By default, only one step is present. If you have more than one audio or TTS paragraphs, you may add more steps by pressing button.
| Some sections are collapsed by default to reduce cognitive load. When necessary, click on the section title to expand or collapse a section. |
-
To broadcast an audio file, click on the text input fields of the first line in
Default playlist. A drop-down will be shown where you can select from all of your previously uploaded audio. To upload a new audio, click on button which will open the audio uploader modal.
After a successful upload, the audio will be automatically selected.
DandyDialer supports various common audio file formats, i.e. - mp3, wav, ogg.
|
-
To broadcast a speech generated from text, click on the play-type selector button (
),
and select TTS. In place of the audio selector, you will now see a text box. Write your message in the box. You may click on the audio preview button( )
shown besides the box to listen to the computer generated voice.
-
You may configure how the machine generated speech sounds. To view related options, click on
Text-to-speech (TTS) settings.
| Depending on your subscription, some better quality TTS engines might be grayed out. To use them, you need to upgrade to a higher tier subscription. |
-
Key press handlingsection lets you configure the user interaction.
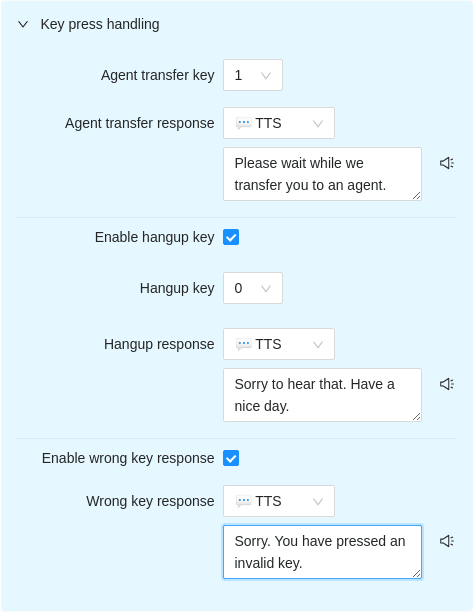
-
Agent transfer keyis the dialpad digit callees are supposed to press when they agree to be transferred to an human. You can optionally play a voice response whenever that happens. -
Selecting
Enable hangup responselets you to configure a dedicated key for hanging up and play optional voice response as a courtesy. -
Selecting
Enable wrong key responselets you configure a voice response for invalid or erratic key presses. -
Optionally, you can configure the
Voicemail playlist. If your clients miss the call, their answering machine can get the news for them. DandyDailer automatically detects the beep of an answering machine and drops the voicemail.
| Voicemail functionality is only available in higher tier subscriptions. |
-
Click
Saveto save the newly created press-1 call script.
4. Attaching a contact list
-
Our next vital campaign resource is a contact list. In DandyDialer, a contact list is a list of phone numbers. You can attach multiple contact lists to each campaign.
| Besides phone number, DandyDialer supports importing and editing all kinds of information about a contact, i.e. - name, email, address etc. You can use it as a light-weight CRM, if you wish. |
-
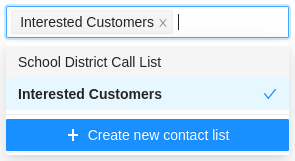
Clicking on the
Contact Listsselector will show you a drop-down of all the available contact lists. You can select existing contact lists or create a new one.
-
If you want to upload a new contact list, press
 button to open
the contact list creator wizard.
button to open
the contact list creator wizard.
4.1. Uploading new contact list
-
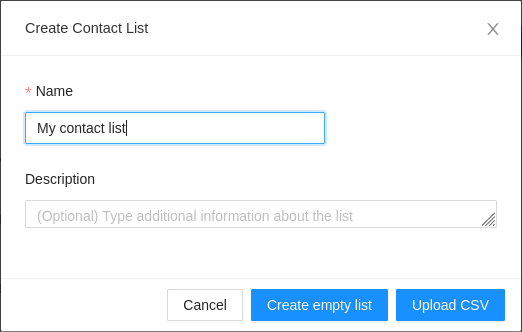
At first, enter a
Namefor the new contact list. Optionally, give it aDescriptionfor better organization. -
Click
 button. This should create the new list
and open a contact importer dialog.
button. This should create the new list
and open a contact importer dialog.
-
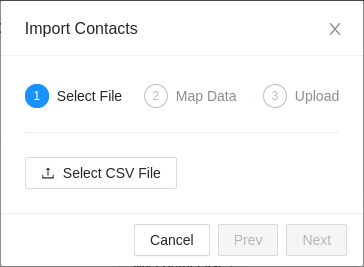
Click on
 button. A file selector dialog will appear.
Select the CSV file containing phone numbers of your target audience or leads.
Click
button. A file selector dialog will appear.
Select the CSV file containing phone numbers of your target audience or leads.
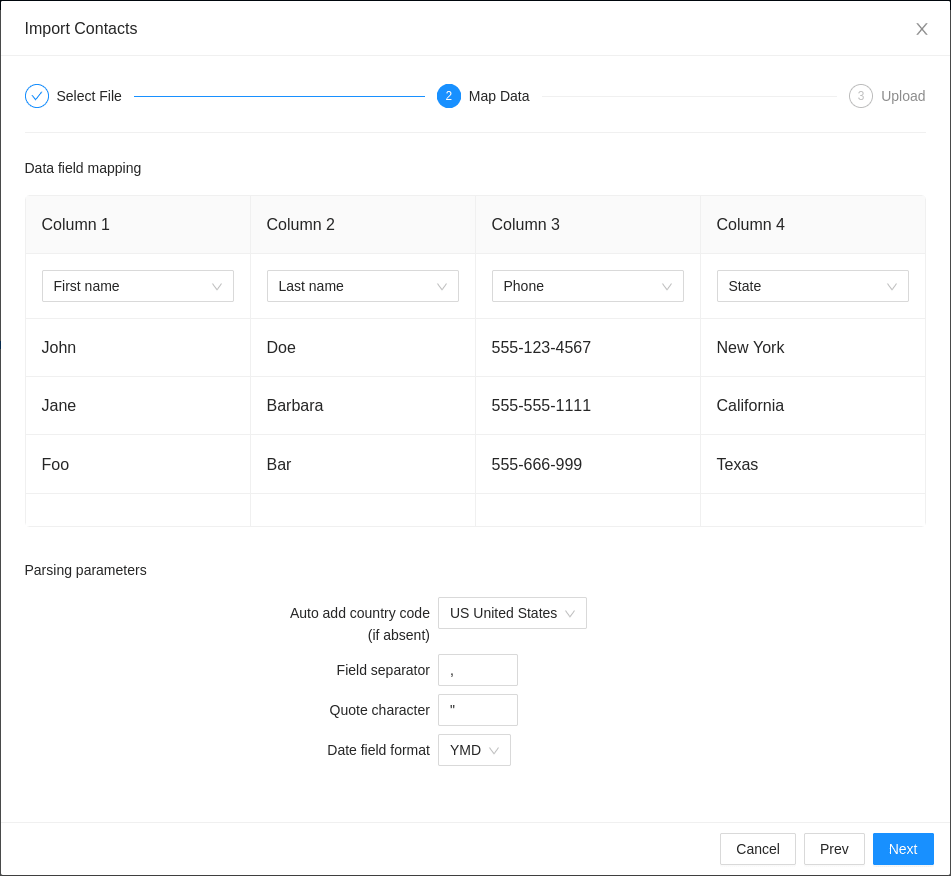
Click Nextto map the columns of your CSV file to proper data fields in DandyDialer.
-
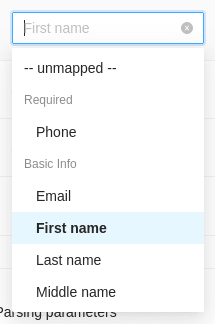
The column mapping window displays the first few lines from the selected CSV file. Above each column, there is a selection box. Click on it to select an appropriate data fields. At the minimum, the
Phonefield must be mapped to a column.
DandyDialer supports a wide variety of data fields of various types.
Still, if you have data columns which are not covered,
you may use the aptly named miscelleneus fields -
Misc. data, Misc. data - 2, Misc. data - 3.
|
-
In the
Parsing parameterssection,Auto add country code (if absent)selector needs some attention. Internally, DandyDialer stores each phone number in international format. As a consequence, to import local phone numbers, an international telephone prefix must be added in front. If the phone numbers you are importing already have an international prefix, like -+1-XXX-XXXXXor001-XXX-XXXXX, DandyDialer will automatically ignore this fallback prefix.
| Some SIP gateways only recognize local numbers. For such gateways, phone numbers can be set to automatically be formatted to their local form during campaign run. DandyDialer also supports adding custom dialing prefix in-front of local numbers. You can find the related options in gateway settings. |
-
Click
Nextto upload the CSV file to server and begin contact importing.
5. Attaching a caller-ID
Caller-IDs represent your identity as a caller. During a campaign call, mobile phone users will see this number as the call originator. Ideally, it should be a regular phone (DID) number where you can receive incoming calls. People you are calling should be able to reach you by dialing this caller ID number.
| If you use voicemail dropping functionality of DandyDialer, it is a good practice to set caller ID to the call-back number of the voicemail message. |
| DandyDialer does not handle incoming calls. |
-
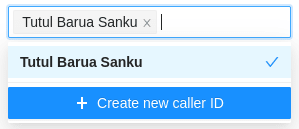
Clicking
Caller IDsselector will show a drop-down, listing all existing caller IDs in the system. You may select one or more from them. If you want to create a new one, click on button.
| If multiple caller-IDs are selected, different callees will see different caller ID numbers, evenly divided between all the callees of a campaign. Selecting multiple caller IDs is specially beneficial if you are expecting many call-backs simultaneously. |
5.1. Adding new caller-ID

-
To add a caller-ID, simply type in the phone (DID) number in the
Phone Numberfield.
| Before you add a caller-ID, make sure whether your SIP gateway approves use of the said caller-ID. Some SIP providers are very lax about this and approves any number. Others, like Twilio will only allow numbers leased from them for a charge. |
-
Optionally, you can give this caller-ID a
Name. -
Click on
Addto save the caller-ID.
6. Attaching an agent (only for auto-dial and press-1 campaigns)
If you are creating an auto-dial campaign or a press-1 campaign, at least one agent must be attached to the campaign. In DandyDialer, an agent is human who is reachable through a phone (DID) number or a SIP address. After the callees of a press-1 campaign presses the affirmative key (usually ''1''), the call is transferred to the agent.
Agents selector is only visible if you have selected
either an auto-dial call script or a press-1 call script.
|
-
Click on
Agentsselector to see a drop-down of all existing agents. You may select multiple agents. If you want to create a new agent, click on button. This should open
the agent creator wizard.
button. This should open
the agent creator wizard.

6.1. Adding new agent
-
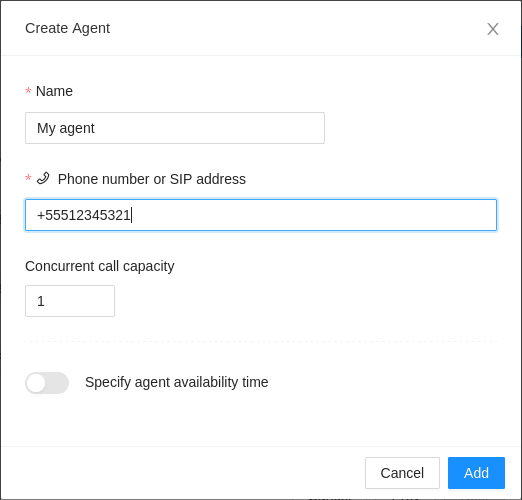
As in other resources, you will have to give your agent a
Name. -
Enter the phone (DID) number of the agent in
Phone number or SIP addressfield. -
Alternatively, if your agent is using a SIP softphone, enter their SIP address. For example -
sip:john:[email protected]:5060is a valid SIP address. Consult your softphone documentation to get the correct SIP address. -
Concurrent call capacityis by default set to one. If you are using a call-center to employ a group of agents, set this limit appropriately.
| DandyDialer is careful about not dropping transferred calls. As such, it will only dial new numbers if at least one of the agents is free (call capacity not saturated). For press-1 campaigns, it is important to employ sufficient number of agents to keep campaign throughput high. |
-
Click
Addbutton to save the agent to system.
7. Attaching a SIP gateway
A SIP gateway is a bridge between DandyDialer and a telephone network. For a campaign to be able to make outgoing calls, you must attach a SIP gateway to it.
| To know more about what is a SIP gateway, please read this section. |
-
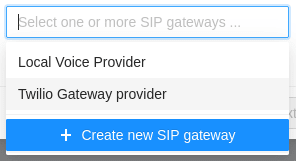
Click on
SIP Gatewaysselector to view a list of all the available gateways. You may choose more than one gateway, if you want to evenly distribute your calls through all of them. -
If you want to create a new SIP gateway, click on
 button. This should open the
SIP gateway creator wizard.
button. This should open the
SIP gateway creator wizard.
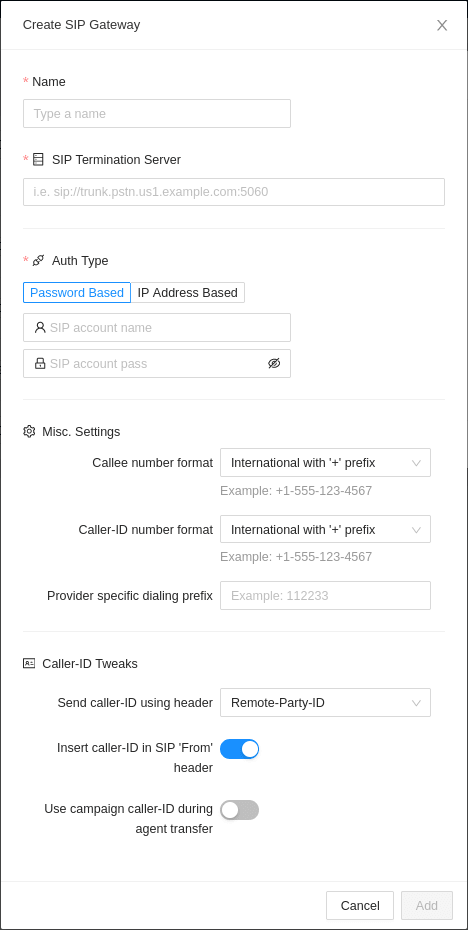
7.1. Adding new SIP gateway
-
As in other resources, give your SIP gateway a name using
Namefield. -
SIP Termination serveris the url or server address of your SIP gateway. You should consult your gateway provider to determine the exact address of their SIP Termination server. Here’s a few samples of what it might look like --
sip://trunk1.us1.example.com:5060 -
trunk2.eu.example.com -
203.0.113.50:5080Don’t include SIP account username and password in this field. Don’t do this - sip://maria@1234pass:trunk3.example.com
-
-
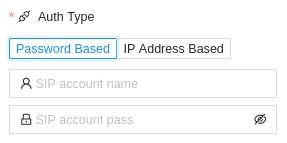
Next, you will have to set up authentication parameters for your gateway, using the
Auth Typesection. DandyDialer supports two kinds of authentication --
Password Based -
IP Address Based
-
-
If your SIP gateway provider supports username and password based authentication click on
Password Basedbutton. Type in the SIP username and SIP password (obtained from your SIP gateway service provider) in the input boxes.
-
If your SIP provider provides IP address based authentication click on
IP Address Basedbutton. You will be shown a list of pairs of IP addresses and port numbers. Use your gateway provider’s management portal to allow calls from these addresses and ports.
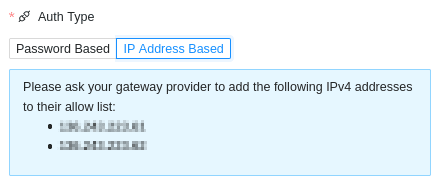
| IP address based authentication is only available in higher tier subscriptions. |
-
The rest of the options in
Misc. settingssection andCaller-ID Tweakssections are various flags to align DandyDialer with expectation of the SIP gateway. In most cases, the defaults should work. If calls don’t go through, ask our support team to configure these options for you. -
Click on
Addbutton to save the new gateway.
You can easily test whether a SIP gateway is correctly set up or not
without starting a campaign.
1. Go to SIP Gateways panel from left side menu.
2. Select the gateway to test from the center table.
3. Click on  button. This should open the gateway test wizard. button. This should open the gateway test wizard.
|
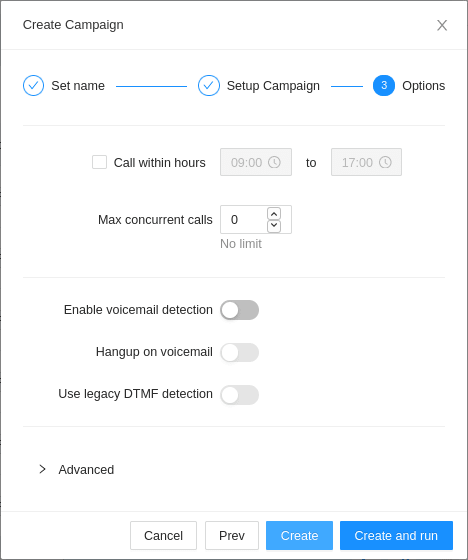
8. Configure campaign options
After all the resources are attached to a campaign, you should press Next.
This will bring you to the last stage of campaign creation.
-
If you are impatient and just want to see the campaign in action, click
Create and runbutton and skip to controlling and monitoring section. -
Call within hoursselector needs some attention if you have a very big list and you want DandyDialer to not annoy people by calling at inappropriate hours in their timezone. For marketing and other low-priority campaigns you should set it to business hours.
|
DandyDialer can automatically control schedule of a campaign,
if you setup a
|
-
If you intend to drop voicemail on callees' answering machine, turn on
Enable voicemail detectionswitch. -
Alternatively, you might not be interested to waste time with a call that is going to voicemail. In that case, switch on both
Enable voicemail detectionswitch andHangup on voicemailswitch.
| Voicemail detection is only available in higher tier subscriptions. |
-
Some SIP gateway providers use very old technology to transmit key press information (also known as DTMF codes). If your tests suggest that key presses are not being handled properly, turn
Use legacy DTMF detectionon.
| Legacy DTMF detection feature is only available in higher tier subscriptions. |
9. Controlling and monitoring your campaign
If you completed all the previous steps, your campaign should be up and running. Congratulations!
In this section, I will briefly describe how to control and monitor your newly created campaign.
-
On the
Campaignspanel, all of your campaigns are listed in a table. To select a particular campaign, click on it.

-
The small blue progress bar below the campaign name let’s you quickly judge the how far the campaign has progressed.
-
The
statuscolumn indicates current status of the campaign , i.e. -ACTIVE,PAUSED,COMPLETEetc. -
At the end of the table row, there are some quick controls to pause/resume and edit the campaign.
-
If you want to pause the campaign temporarily, click on
PAUSEbutton. A paused campaign can be resumed any time with theRUNbutton. -
If you want to cancel an active campaign midway, click on
Abortbutton. Your campaign statistics won’t be harmed. -
You can restart a
COMPLETEcampaign with the help ofRestartbutton. In that case, your analytics will be reset.
-
Change of campaign states might take some time. DandyDialer
is careful not to hangup ongoing calls midway, specially
the ones where an agent is connected to a callee. If you
see a clock symbol (  ) besides the campaign state, it means DandyDialer is
waiting for existing calls to finish, although it won’t
make any new calls. ) besides the campaign state, it means DandyDialer is
waiting for existing calls to finish, although it won’t
make any new calls.
|
-
At the right side, you can see a context panel with details about the selected campaign.
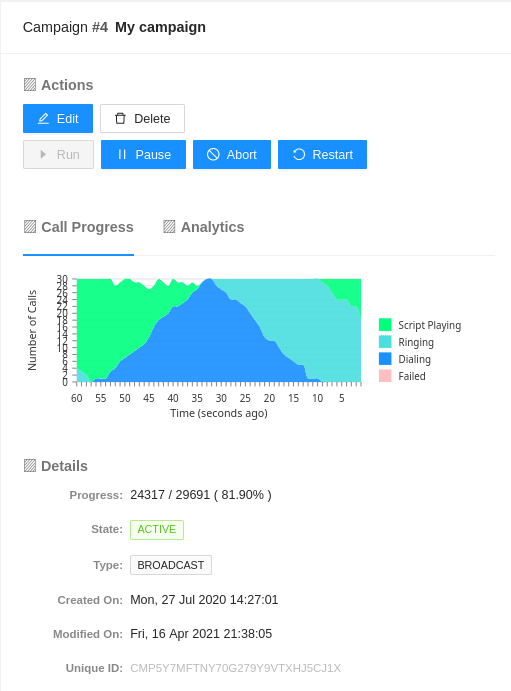
-
The
Actionssection contains some self-explanatory buttons to modify and control the campaign. -
At
Call progresssection, you can see a real-time graph of your campaign’s progress. It displays how many calls are in what state, for the past 60 seconds. It updates every second. You can hover on the graph to view the actual numbers in each data point.

-
Clicking on the
Analyticstab will show you various analytical data about the campaign. The are five sub-tabs -Conversion ratio,Conversion flow,Call counts,Duration metricsandHangup Analysis, each displaying different metrics using graphs and tables.
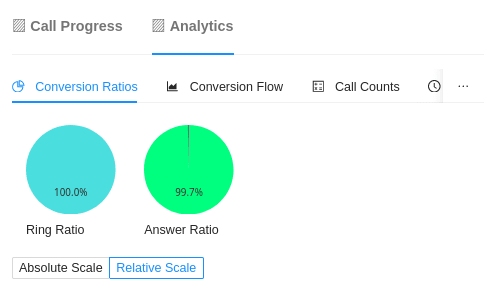
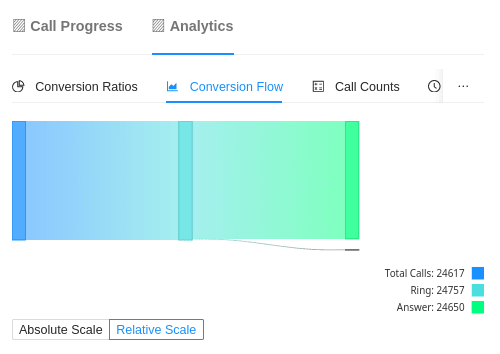
-
The
Detailssection displays various information about the campaign in a simple descriptive way.